Day 1:
Introduction to PHP
Welcome to PHP In 15 Days – Guaranteed Training Course, day1. On this very first day of this training, we will study some of very basic things and will try to understand these practically. In coming days we will speed up our pace of teaching and learning, as you’d have become comfortable with my teaching style.
Today we are going to learn
· How to install and configure a workingenvironmentfor PHP
· PHP/Text Editors
· PHP Syntax, Hello World, Echo and Print, Examples
· Variables
What is PHP and reason to learn it?
PHP is a powerful and an amazing language used for web-development. Let’s discuss few of the things about PHP which give this language edge on other languages.
· PHP was known as Personal Home Page, long ago, but now PHPstands for Hypertext Preprocessor.
Why Hypertext? AsPHP contains text,and that is not in its normal state. So it’s a bit hyper-text.
And why pre-processor? As PHP is always processed first and then returns the results to us. That’s why it’s pre-processed. We’ll discuss all of this in detail in a moment.
· Server Side Language.
PHP is a server side language as it always executes on the server.
· Loosely typed Language and Flexible.
PHP is much flexible as compared to other programming languages, so it’s often known as loosely typed language. You don’t even have to define many things prior to use them. In most other programming languages, you need to follow strictrules. PHP is way beyond of it.
· PHP is very strong and deep as it can produce any imaginable logic and can come up with the most complex and advanced structure to handle all requirements of the applications under development.
· PHP is one of the world’s most widely used and powerful languages.
· World’s most popular blogging systems, CMS and commercial and portals systems are built on PHP. (Someof the examples are WordPress, Drupal, Joomla, Magento, Jobbers and many more.)
· PHP is an easy to understand language.I am sure you will enjoy learning it. It’s as easy as you learn the Mathematics of 5th Standard.
· PHP is freely available, and most of all,it’sopen source.
Why You Must Choose PHP To Learn!
A saying I found on PHP.net
“The best things in using PHP are that it is extremely simple for a newcomer, but offers many advanced features for a professional programmer. Don't be afraid reading the long list of PHP's features. You can jump in, in a short time, and start writing simple scripts in a few hours. ”
This is what I want to assure you from the start of the introduction, PHP is so easy. Just you need to stay focused, pay attention and try to do whatever you learn in each session on your own.
Environment(speech less)
As you know PHP is a server side language. So, we need an environment to work in, to send requests and get the output from the Server and PHP. So, there are three main things we need to have installed on our machine to work with PHP.
· Server (Apache, IIS or any other which supports the Operating System)
· PHP
· MySQL
A very easy way to installall of these programs on your machine is to download and install a full package containing all of these applications.
If you are aWindows user, you can download and install WAMP. This stands for windows, apache, MySQL and PHP.
· Windows Users: WAMP (Windows, Apache, MySQL, PHP)
If you are using MAC OS then, you can download and install MAMP. This stands for Mac, Apache, MySQL and PHP
· Mac OS: MAMP (Mac, Apache, MySQL, PHP)
There is another option for both of these operating systems and that is to download and install XAMPP. It’s also one of my favorite application to work with. XAMPP is aflexible application and don’t often produce errors or conflicts with operating systems or even with other programs running on your system. However, you are free to choose any of these but this is just my own preference. XAMPP stands for, X for any operating system, means, it can work with any Operating System, A for apache, M for MySQL, P for PHP and the last P for Perl.
· XAMPP (X for any OS, Apache, MySQL, PHP, Perl).
Installation
Let’s go ahead and install XAMPP on our system.
1. Google for XAMPP and get some results.
2. Now click and browse few of the sites fromthese results.
3. I personally like XAMPP’s own site, Sourceforge and Apache friends’ sites to download the package. As these sites are really straight forward and packages available are up to date and bugs free.
However, you can download it from any of the reliable resources available on the internet.
We are at Sourceforge right now to download XAMPP. This download is especially for windowsbecause I am running Windows on my computer. Hereyou can see all the downloadable files in this section. All having the same version which is the latest one. This top link is the package along with installer. So, it’s been downloaded more than all other packages. Second link is zipped as 7z, third one is also, zipped as zip. You can download any of these. This is Apachefriends’ site and this one is Sourcefordge. We can download directly from this button. Let’s download this. I have already downloaded it to save some time. Let’s go to the download folder. We have downloaded the Package with installer. Just double click on this. You can get this message if you are running an antivirus on your system. Sometimes, antiviruses assume the installation files of the application as virus and try to block their activity. This causes the errors and doesn’t allow the application install successful. It’s better to stop antivirus and then run the installation. For now, let’s just continue to installation.
This is the message you will not see when you will install the XAMPP for the first time. I have already installed and running XAMPP on my system, that’s why, I am getting this message. You don’t worry about this. Click OK. Now, this is the actual pop up screen for the installation setup. You will see this window when you will run the installer. This installer has made installation whole lot easier for us. You will see how easy and straight forward it is to install XAMPP. Just click Next button.
Here on this screen you can select and deselect the applications as per your own requirements. In the server section Apache that is the main server application, MySQL is the database and is extremely important component, FileZilla FTP is a program used to transfer files from computer to the server, which is not really important at this point, as you can transfer files directly too. But this makes your work whole lot easier. It’s all up to you. You may deselect it too. Mercury Mail Server to send and receive emails and Tomcat, we don’t need these so, we can uncheck both of these. In Program Languages we don’t need Perl, Webalizer and FakeSendmail.you may uncheckall of these too. But these all have their own purposes and help you in lot of situations. Now, let’s take all the options to their default position and click next.
Now, here it’s asking where we want our XAMPP to be installed. I highly recommend that you install your XAMPP on second or third partition of hard drive. Don’t ever install it on C drive of your computer. There you can see the folder icon, you can click and get to the folder where you want to install it or you can write the path directly here in this bar and you are ready to go. Just click next and it will install the XAMPP finally. I am aborting as I have already installed it.
We just installed the XAMPP successfully and now it’s time to run it. Let’s go to the start, all programs and here you can see XAMPP folder. Just click on it and you can see different applications and options. From here just click the XAMPP Control Panel. Every time when you click XAMPP control panel this window will show up. Here on this window you just need to start the programs you need. In most of the cases we just need to start Apache and MySQL. Just click on Start buttons against the names of these programs. Any name of the program that turns to green, means, it’s running now without any errors or issues.
You can confirm whether it’s running or not.Just open any of your browsers and write localhost/xampp hit enter. OK, if you see this screen, everything is fine.
Where to store PHP file?
Now we want to know where we can store our project files. To store project files and folders:
· Go to the XAMPP installation folder i.e. the folder or directory where you installed XAMPP.
· Now go inside the XAMPP folder and then to htdocs folder.
· Here you need to create your own folder and name it according to your project.
Let’s name this folder as ‘phpin15days’. This name is just for demonstration purpose. Don’t you ever put spaces between the words used forthe name of the file or folder and always use small letters case. However, you can put ‘-’ a hyphen or ‘_’ an underscore, between words. You can assume this folder as your fullwebsite. This folder is the container for all of the files and directories of your website. So, you should name this folder or directory according to your website project.
Now we have our main project folder that is themain website containing folder in place. Now, let’s create a PHP file, using PHPStorm, let’s start the PHP Editor. From here we will go to the folder we just created i.e. ‘phpin15days’ , here it is and just click OK. Here on the left side, you can see it’s our own project’s folder that we just created. Here we can create our new files and folders. Just right click on the main folder icon to create a new file or folder, and click on New and then PHP File, click here. Now you need to define a name for this file, as you usually do when you create a new folder or file within MS Office or Windows. You can see the extension here and that is PHP. As we have already chosen the option to create PHP file, so PHPSTORM has given this file PHP extension by default. Now let’s just name it ‘index’ and you can see here in the left bar, we have a file under the main directory. So, here, we can see all of the files and folders of our project in hierarchy andcan easily understand the path and destination of any file or folder. Let’s just verify it by opening the folder usingWindows Explorer and you can see in htdocs folder, we have folder, ‘phpin15days’.Let’s go inside this folder and here is the index file we just created through PHPStorm. Don’t worry about this .idea folder, it’s just created and used by PHPStorm and has no connection with our site/project at all.
What is a PHP file?
· PHP file is a simple text file with just the extension changed to PHP. What is the purpose and use of this extension, we’ll discuss it in a moment.
· You can create a PHP file with any text editor like notepad, notepad ++, MS word, dreamweaver, textmate, PHPstorm, netbeans etc. It’s totally up to you.
· PHP file mightliterally contain anything. You can put HTML, CSS, jQuery, JavaScript and off-course PHP code in it.
PHP Syntax:
Now we are in our index.php file we just created. Let’s have a look at PHP syntax.
PHP syntax is extremely easy to understand and fairly readable.
· PHP starts with <?php . This is the opening tag for PHP.
This opening tag works like the opening tag of HTML. What does HTML opening tag do? This tells the browser the html has been started from this point and the closing html tag tells the browser that we have done with html. No more html on this page. Sothis PHP opening tag tells the PHP parser, or Engine, Hey, pay attention here. Here is some PHP code coming up.
So,we will write all the PHP code after this starting PHP tag.
To close or end the PHP coding we just need to put the PHP closing tag.
· PHP Ends with ?>. This is PHP Closing tag.
This tag tells that we have finished writing PHP and PHP parser stops parsing or processing the code beyond this tag. That is why,
· All the code must be enclosedwithinPHP start and end tags.
As you already know PHP language is a pre-processed language and executes on the server. So, we don’t get any kind of output for client side until and unless we provide a command to PHP to show or send some output for client side.
· To display something on client side,we writeeither echo or print just before the output we want. You can write any of these. Both of these are same in the meaning and do the same action.
· One thing you should keep in mind that you are not allowed to write anything like you have been writing within HTML. You need to put single or double quotes around strings or sentences you want to write.
Let’s have an example: echo ‘Hello World!’.
You need to start single quotes and then your sentence or text and then closing single quote. So, enclose every sentence within quotes. You can use single quotes as well as double quotes. However, these quotes slightly differ, and we’ll see what the difference is, in an upcoming tutorial. So, don’t worry about this. Just remember that
· Every sentence or text we write should be enclosed within quotes
· At the end of eachline put a semi-colon. This semi-colon is an indication that this line of command or output has been completed. So, every line of PHP code ends with a ; (semicolon).
I recommend you to practice this for some time and get used to of this PHP syntax. Like, try to write PHP opening and closing tags, write, echo or print and enclose any text within single or double quotes and close the line with a semicolon.
Let’s put another line of code with print now.
print ‘This is our first page’;
Now we have created our index.php file. Here comes the question in mind thathow we are going to access this file through server. Let’s do it now.
Accessing Files From Server.
We should not access or open our PHP files directly in the browser like you have been doing while working with HTML and CSS files. We’ll run our files through the local server that is XAMPP, we installed a while ago. PHP is a server side language that we already know. So, to let it process all of the code we have written in our PHP files, we must send files to the client side through server and PHP engine. To do this
· First of all start XAMPP application.
· Run the utilities of Apache and MySQL
· Make sure both are running and have turned to green.
· Sometimes, Apache doesn’t start due to the conflict of ports. Apache needs to acquire port 80 and sometimes it is occupiedby some other application like Skype already. If that’s the case, close the other application and then re-start XAMPP. Once XAMPP is running, you can start other application too.
· Now open any of your browsers.
· Write localhost/your_folder_name/file_name.extension in the address bar and press enter andthat’s it. Now, the file has beenexecuting through the server.
In our case just write
localhost/phpin15days/index.php
You can see both of the messages here, we wrote in our index.php file. ‘Hello world’, ‘This is our first page’
Now, let’s try to write something beyond PHP tags. Let’s write the same thing here after this closing PHP tag. ‘Hello world! This is our first page.’ Both have same output. So, what the difference is. The text which is written within the PHP tags is executed through PHP engine after being processed. To prove this let’s go to our code and remove this echo from here. Now this text ‘Hello world!’ will not show up.
Go to the browser and refresh the page and you can see we don’t have ‘hello world’ text here. Let’s view the source code, but it’s not in here too. The reason is, we did not tell PHP Engine to output this ‘Hello World’ text to the client side. With this ‘echo’ word or ‘print’ word we issue a command to PHP to displaytext to the client side. So, keep note of the full syntax. To show anything at client side, use echo or print then write all the text you want to write within single or double quotes and at each and every command or line where your command has been completed put a semi-colon.
How does PHP execute?
I would like to demonstrate you how PHP executes at the backend. You don’t need to know this, but if you have some idea of it, you will get real picture of the process and you will enjoy while working with PHP. When I was learning PHP, this was always in my mind that how everything works, maybe this wit of mine pushed me to tell you the whole process. We will not go in details just a quick glance.
Your browser is called the client side. When we write a URL in the address bar and hit enter, the browser sends the request for aweb-page. Now, Server needs to respondto this request. As a response server has to collect andsend the requested files to the client side.Before sendingresponse to you or client side, Server just looks for the extensions of the files and if it findsa filehaving extensionPHP, it sends that particular file to PHP Engine.PHP Engine then processes allof the files and gives resultsback to theServer.
Server collects these processed files and along with all other requested files sends back to the client side as a response and that’s it. This is the actual reason, why PHP is always known as pre-processed Server Side Language. Now, I am pretty sure that you can understand what we did before and why the PHP files must run through the server and why the text was not been displayed when we removed echo.
Variables:
Variables are the most important particles of any programming language. Without these I don’t know, but I think, programming would have been a real headache. So, let’s understand what these variables are and how we create them.
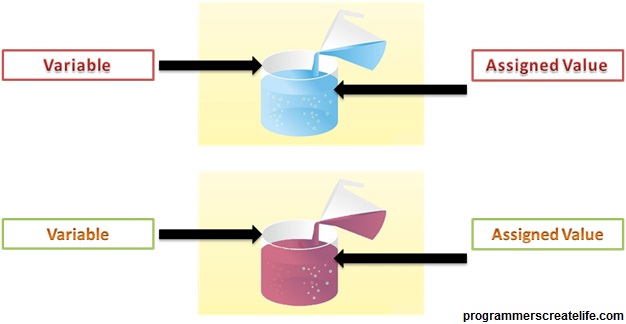
· Variables are containers of some data.
· Every variable temporarily holdssome assigned data.
· Variable stays till it’s used or changed.
· Variable is like an empty vessel or container. You can assign it any value.
For example:You pour water in a container, it becomes the container of water till you empty it or replace the water with some other liquid.
Now let’s create our first variable. First thing you need to declare a variable is a $ sign. Every variable starts with a dollar sign. Then you can name it any of your choice. Good practice is just name the variable starting with lower case letters or an underscore. Just stick with these. What is good practice or bad practice, don’t give your head to them. Just stick with a small letter and or an underscore. You cannot use a ‘-’ within your variable names but can use integers.
Let’s name our variable ‘a’. And to assign this a value we just place equals sign and then define the value, don’t forget to put the semi-colon at the end of this line as we have finished declaring variable a. You may have noticed we did not put quotes around 10, because, this is an integer and we can write an integer or number or any numeric value without quotes.
$a = 10;
Now what we can do is, we can print this value at client side. To show this in our browser, let’s just echo it out.
echo$a;
Let’s check this out in our browser. You can see 10 here. So, what happened actually, we assigned 10 to our variable and then echoed out this variable. PHP will echo only the value of the variable and value can be anything. So, we can see 10 as a result.
Let’s redefine variable $a and this time, assign a different value.
$a = 'This is my first variable.';
And echo it out to the browser too
echo$a;
We can put any html tags within our PHP code, but we need to comply with the syntax of PHP. Let’s put br tag between these outputs. You can see I have used single quotes around this and also echoed it out as we need it in our browser or at client side. Let’s go to the browser and check the output and this time you can see our text is shown line by line due to the tags we used. Also, two different texts shown for the same variable. As variable stays until it’s used or changed.
So, what’s happening here is, we assigned value of 10 to the variable a and then assigned a text value to this variable a, until and unless we did not change the value of our variable it stays same.
I would like you to practice it on your own, try to write different things and show them through browser, create variables with different names, assign different values to the variables and get yourself well used to of it.
Practice files Day #1
Download
So, this is all for variables and for day1 as well. Will see you on day2, take care.